Small Studio Furniture Layout: Unlock Potential 2025
Why Small Studio Furniture Layout Matters More Than You Think
A smart small studio furniture layout is the key to changing a cramped, single-room space into a functional, comfortable home. When everything happens in one room, a thoughtful layout creates clear pathways, distinct living zones, and hidden storage that keeps clutter at bay. It’s not about having less—it’s about arranging what you have in the right way.
Quick Answer: The 3 Essential Steps for Studio Layout Success
- Define Your Zones – Divide your studio into distinct areas for sleeping, living, and working using furniture placement, rugs, or room dividers.
- Choose Multi-Functional Furniture – Select pieces that serve multiple purposes (sofa beds, storage ottomans, expandable tables) to maximize every square foot.
- Go Vertical – Use wall-mounted shelves, tall bookcases, and hooks to free up precious floor space.
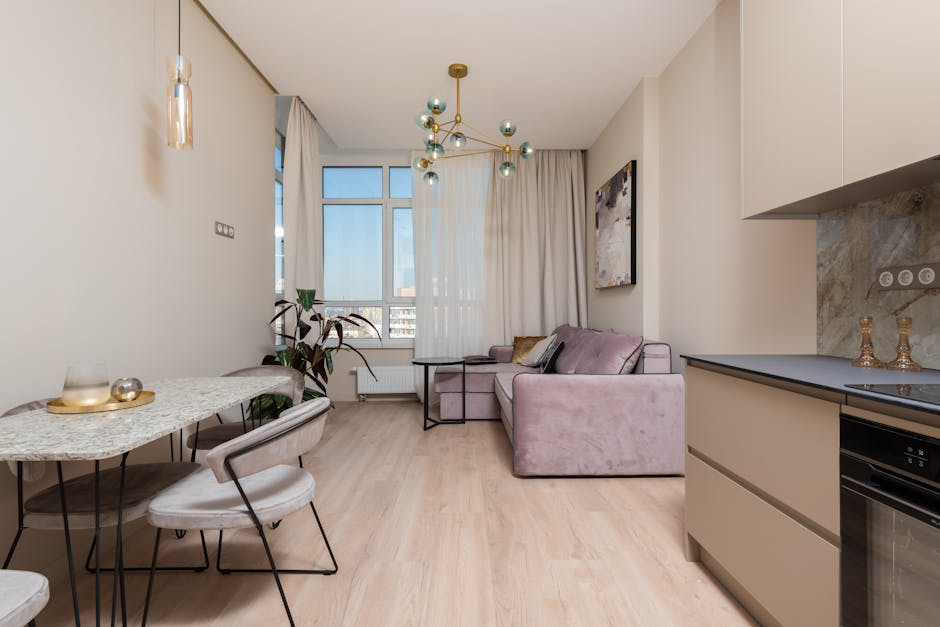
Living in a studio apartment means dealing with one big challenge: everything happens in the same room. The average studio ranges from 350 to 600 square feet. That’s not much space for sleeping, working, cooking, and relaxing.
The good news? A smart furniture layout can make even the tiniest studio feel spacious and organized. When you nail your layout, you’ll create a home where you can actually live instead of just survive.

The Foundation: A Smart Small Studio Furniture Layout
The secret to a functional studio isn’t just what you put in it—it’s where you put it. Before buying furniture, plan your small studio furniture layout to ensure clear pathways and defined zones. A great trick is to use painter’s tape to map out where your bed, living area, and workspace will go. This helps you visualize the flow and see how everything fits before you commit.
By creating distinct zones, you’ll transform a single space into a home that feels organized and intentional, even if you’re technically sleeping in your kitchen.
Creating Distinct Zones for Living, Sleeping, and Working
Use these tricks to make one room feel like several:
- Define with Rugs: An area rug under your sofa and coffee table instantly creates a “living room,” visually separating it from other areas.
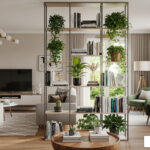
- Use Furniture as Dividers: Position your sofa with its back to the bed to create a natural boundary. An open-backed bookshelf is even better, as it divides the space while letting light through. For more ideas, see our Tiny Apartment Design: Ultimate Guide.
- Create an Entryway: A small bench with shoe storage and a wall-mounted coat rack near the door contains clutter.
- Design a Flexible Workspace: A fold-down desk or a dining table that doubles as your office saves space and helps you switch off after work.
How to Create a Comfortable Sleeping Area
Your bed should be a retreat, not just another piece of furniture. Create a cozy, private feel by:
- Adding Dividers: Use curtains on a ceiling track for soft, space-saving privacy that can be pushed aside to open up the room.
- Using Nooks: Place your bed in any available alcove or corner to make it feel like a separate room. Make the nook special with peel-and-stick wallpaper or a different paint color.
- Choosing Storage Beds: A bed with built-in drawers or shelving around the headboard provides essential storage without using more floor space.
For even more inspiration on arranging your space, browse our Studio Apartment Layout Inspiration for real-world examples that work.
Comparing Room Divider Options
The right divider depends on your needs for privacy, storage, and flexibility. Here’s a quick comparison:
| Room Divider Option | Pros | Cons |
|---|---|---|
| Curtains | Extremely space-saving since they take up zero floor space; Easy to open for an airy feel; Add softness, color, and personality; Affordable and easy to install | Offer less soundproofing; Provide minimal privacy if fabric is thin; Can look cheap if not chosen carefully |
| Shelving Units | Add valuable storage space; Create a structural, permanent-feeling division; Can be styled from both sides; Allow light to filter through if open-backed | Can block natural light if solid-backed; Take up floor space; Can feel bulky in very small studios; May require anchoring to walls for safety |
| Folding Screens | Highly flexible and portable; Can be moved or folded away entirely; Add decorative interest; Work well for temporary separation | Can be unstable or tip over easily; Don’t provide much soundproofing; Take up floor space when in use; May look flimsy depending on quality |
Introduction

Living in a studio apartment means solving a unique puzzle: making one room handle everything from sleeping and cooking to working and relaxing. It’s a lot to ask from an average of 350 to 600 square feet.
But a smart small studio furniture layout isn’t about cramming things in; it’s about being intentional. The secret lies in three key areas:
- Creating Zones: Even without walls, you can carve out distinct areas for different activities. This separation helps you switch from “work mode” to “relax mode” and makes your space feel larger and more organized.
- Smart Storage: In a studio, clutter is the enemy. When everything has a home—preferably hidden or neatly displayed on vertical surfaces—your space will feel calm and open.
- Functionality and Style: You don’t have to sacrifice one for the other. Multi-functional pieces, thoughtful color choices, and strategic lighting can transform the tiniest studio into a beautiful and livable home.
This guide will walk you through exactly how to achieve this, turning your small studio into a space that lives large.
Why Small Studio Furniture Layout Matters More Than You Think
Small studio furniture layout is the key to changing a cramped, single-room space into a functional, comfortable home. Here’s what you need to know:
Quick Answer: The 3 Essential Steps for Studio Layout Success
- Define Your Zones – Divide your studio into distinct areas for sleeping, living, and working using furniture placement, rugs, or room dividers
- Choose Multi-Functional Furniture – Select pieces that serve multiple purposes (sofa beds, storage ottomans, expandable tables) to maximize every square foot
- Go Vertical – Use wall-mounted shelves, tall bookcases, and hooks to free up precious floor space
Living in a studio apartment means dealing with one big challenge: everything happens in the same room. The average studio ranges from 350 to 600 square feet, though some are as small as 200 square feet. That’s not much space for sleeping, working, cooking, and relaxing.
The good news? A smart furniture layout can make even the tiniest studio feel spacious and organized. It’s not about having less—it’s about arranging what you have in the right way.
When you nail your layout, you’ll create clear pathways, distinct living zones, and hidden storage that keeps clutter at bay. You’ll also make room for the things that matter: a comfortable bed, a functional workspace, and space to actually live instead of just survive.
I’m Ramy Saber, a civil engineer and founder of Tiny Living Genius, where I’ve helped countless people solve their small studio furniture layout challenges through practical, tested strategies. My background in project management and facility operations gives me a unique perspective on maximizing functionality in compact spaces.
The Foundation: A Smart Small Studio Furniture Layout
Before buying furniture, start with a plan. Your small studio furniture layout is the key to creating a space that flows beautifully. Think about your daily movements—from bed to kitchen, desk to door. Planning around these natural pathways prevents the frustration of squeezing past corners and bumping into tables.
Even in one open room, your brain craves separation. Visualize your main zones: the sleeping area, the kitchen/dining space, and the living area. A great trick is to use painter’s tape to mark these zones on the floor. This simple step helps you see how everything will fit together before you move a single piece of furniture.
This foundational planning is the difference between a studio that feels chaotic and one that feels harmonious, maximizing both function and style.
Creating Distinct Zones for Living, Sleeping, and Working
Breaking up your studio into zones makes it feel more organized and spacious. Here’s how:
- Use Rugs: A large rug under your sofa and coffee table instantly defines a living room, visually separating it from your sleeping space.
- Let Furniture Divide: Position your sofa with its back to your bed for a clear boundary. An open-backed shelving unit works even better, providing storage while keeping the space airy. For more ideas, check out our Tiny Apartment Design: Ultimate Guide.
- Create a Drop Zone: A small bench with shoe storage near the door creates a designated entryway, preventing clutter from spreading.
- Design a Flexible Workspace: A fold-down desk or a dining table that doubles as an office is essential for a functional small studio furniture layout.
How to Create a Comfortable Sleeping Area
Your sleeping area should feel like a sanctuary. Create privacy and comfort with these tips:
- Add a Divider: Curtains are a space-saving favorite, adding color and privacy. You can also use a shelving unit or a decorative screen.
- Use Nooks and Corners: If your studio has an alcove, place your bed there to create a cozy, room-within-a-room feel. Make it special with peel-and-stick wallpaper or a contrasting paint color.
- Make Your Bed Work Harder: A shelving unit mounted around your bed can act as a headboard with storage for books and other essentials, keeping your floor space clear.
For more inspiration, take a look at our Studio Apartment Layout Inspiration.
Comparing Room Divider Options
Choosing the right room divider can make or break your studio’s flow. Here’s a breakdown of what works:
| Room Divider Option | Pros | Cons |
|---|---|---|
| Curtains | Space-saving and easily pushed aside; adds color and texture; budget-friendly and renter-friendly. | Less soundproofing; can collect dust; may not provide full privacy depending on fabric. |
| Shelving Units | Provides significant storage; creates a strong visual division; can be styled from both sides. | Can be bulky and block light; less flexible once placed; may require anchoring for safety. |
| Folding Screens | Highly flexible and portable; adds a decorative touch; easy to store when not in use. | Offers minimal soundproofing; can be unstable; provides only partial visual privacy. |
The Magic of Multi-Functional & Scaled Furniture
In a small studio furniture layout, every piece must earn its keep. Multi-functional furniture is the backbone of comfortable studio living, creating more room without adding walls. Just as important is scale. Avoid oversized, bulky pieces that devour space. Instead, choose low-profile and “leggy” furniture, which allows light to flow underneath and makes the room feel more open.
Essential Multi-Functional Pieces for Your Studio
These are the MVPs of studio living:
- Sleeper Sofas & Daybeds: Provide seating by day and a bed by night. Many include storage drawers.
- Murphy Beds: Fold into the wall to reclaim floor space, often integrating a desk or shelves.
- Lift-Top Coffee Tables: Transform from a coffee table to a dining surface or workstation.
- Expandable & Nesting Tables: Offer flexible surface area that tucks away neatly.
- Storage Ottomans: Act as a footrest, extra seating, and hidden storage all in one.
For even more inspiration on furniture that works harder, check out our guide on Creative Furniture Solutions for Small Spaces.
Choosing Appropriately Scaled Furniture
Oversized furniture can make a studio feel suffocating. To avoid this common mistake:
- Measure Everything: Tape out the furniture’s footprint on your floor before you buy to ensure it fits and allows for clear pathways.
- Consider Visual Weight: A piece with slender legs and a light color feels less imposing than a bulky, dark item of the same size. This is why Mid-Century Modern furniture is so popular for small spaces.
- Use Transparent Furniture: Acrylic or glass pieces don’t block sightlines, tricking the eye into seeing more space.
The bottom line? Choose pieces that fit not just physically, but visually too. For a comprehensive guide to making these smart furniture choices, visit our article on How to Choose the Right Furniture for Your Small Space.
Maximizing Every Inch with Smart Storage
Without smart storage, even the best small studio furniture layout will fail. The key is to first declutter ruthlessly, then integrate storage so seamlessly it feels like part of the design. Look for opportunities in your studio’s quirks, like deep window sills or awkward corners, to tuck away storage.
Going Vertical: Wall Space is Your Best Friend

When floor space is limited, look up. Your walls are your best asset for storage:
- Floating Shelves: Display items without the bulk of a traditional bookcase.
- Wall-Mounted Desks: Provide a workspace that folds away to free up the floor.
- Tall, Narrow Bookcases: Draw the eye upward and offer significant storage. They can also act as semi-transparent room dividers.
- Pegboards: Offer customizable, visible storage for kitchens or craft supplies.
By leveraging every available wall, we keep our floors clear and our studios organized. For a deeper dive, check out our guide on how to Maximize Vertical Space in Small Spaces.
Clever Hidden Storage and Kitchen Efficiency
Hidden storage keeps your studio looking clean and uncluttered.
- Storage Beds: Beds with drawers or lift-up platforms, like the popular IKEA BRIMNES, offer massive space for clothes and bedding.
- Storage Benches: Provide seating while discreetly hiding shoes and other items in an entryway or along a wall.
- Rolling Kitchen Carts: Add extra counter space and storage to a small kitchen and can be moved out of the way.
- Small Kitchen Helpers: Use under-shelf baskets and magnetic knife strips to maximize efficiency without taking up counter space.
For more ingenious ways to keep your studio clutter-free, explore our guide to Smart Storage Solutions for Small Spaces.
Design Tricks to Create the Illusion of Space
Beyond furniture, design tricks can make your studio feel genuinely spacious. The right choices in light, color, and decor play with perception to improve your small studio furniture layout. Start with a light, cohesive color palette to make the space feel bigger and brighter, but don’t be afraid to inject personality with carefully chosen decor.
The Role of Light and Mirrors
Light is your secret weapon for adding space.
- Maximize Natural Light: Use sheer curtains to maintain privacy while letting daylight flood the room.
- Layer Artificial Light: Combine ambient (general), task (focused), and accent (mood) lighting to create depth and warmth. Wall sconces are great for saving table space.
- Use Large Mirrors: A large mirror placed opposite a window can double the light and views, making a room feel significantly larger.
Budget-Friendly Decor and Personal Style
Infusing your style doesn’t have to be expensive.
- Peel-and-Stick Wallpaper: Add an accent wall without a long-term commitment—perfect for renters.
- Textiles and Art: Use pillows, throws, and personal photos to add color and character.
- Plants: A few green plants can breathe life into a small space without taking up much room.
- Choose a Suitable Style: Design aesthetics like Minimalist, Japandi, or Mid-Century Modern work well in studios due to their focus on clean lines and uncluttered spaces. For more on this, see our guide on Mid-Century Modern Furniture for Small Spaces.

By prioritizing what truly matters to you and choosing each piece with intention, you can create a studio that’s both practical and a genuine reflection of who you are.
Frequently Asked Questions about Small Studio Layouts
Here are answers to the most common questions about navigating a small studio furniture layout.
What are the most common mistakes in small studio furniture layout?
The most common mistakes are easily avoided:
- Blocking Windows: Never place tall furniture in front of windows; it kills natural light and makes the space feel smaller.
- Using Oversized Furniture: Bulky pieces overwhelm a studio. Always choose furniture that is appropriately scaled.
- Creating Poor Traffic Flow: Ensure you have clear, easy pathways to move through your space without bumping into things.
- Ignoring Vertical Space: Use your walls for shelving and storage to free up the floor.
- Allowing Clutter: In a studio, clutter quickly makes the space feel chaotic and cramped. Everything needs a home.
How do you separate a bed in a studio apartment?
Creating a separate sleeping zone is key for psychological comfort. Try these methods:
- Use a Bookcase: An open-backed shelving unit, like the IKEA KALLAX, divides the space while providing storage and letting light through.
- Hang Curtains: A ceiling track allows you to draw curtains for privacy and open them up for an airy feel.
- Position Furniture Strategically: Place your sofa with its back to the bed for an instant, no-cost room divider.
- Use a Folding Screen: A decorative screen is a flexible, portable option for visual separation.
How can I make my studio feel bigger?
Use these design tricks to create an illusion of space:
- Use a Light Color Palette: Light colors on walls and large furniture reflect light, making the room feel more expansive.
- Maximize Light: Keep windows unobstructed and use layered lighting (ambient, task, accent).
- Choose Smart Furniture: Select low-profile or ‘leggy’ pieces that show more floor and wall, creating a sense of openness.
- Hang Large Mirrors: Placing a mirror opposite a window doubles the light and the view.
- Declutter: A tidy, organized space will always feel larger and more peaceful than a cluttered one.
Conclusion
Living in a studio doesn’t mean sacrificing comfort or style. It’s about being intentional. By defining your zones, choosing multi-functional furniture, maximizing vertical storage, and using design tricks with light and mirrors, you can transform your space.
A smart small studio furniture layout is the difference between a cramped room and a comfortable home. You have the strategies to open up your studio’s potential and create a space that is functional, spacious, and a true reflection of you.
Ready to keep exploring? Explore more Tiny Apartment Tips and find even more ways to make your compact living space work brilliantly for you!